


by Linda
Since this month is "the season of light", let's talk about those magic circles of light that we so often covet in our photography, especially at this time of year! The beautiful bokeh that makes our heart sing! How can we get "circles" of light opposed to "starbursts" and still have something in focus?
If you do not have "Understanding Exposure" by Bryan Peterson, please go put it on your Christmas list right now. I'll wait....
I won't go into too much detail about why all this stuff works but he will in the book and it is better explained by him than me. I'll keep it simple. And his pictures are quite good, BTW...
For the set up, I used my 50mm compact macro lens and my camera was on a tripod. The scene was shot in a room that was well lit through a window with a sheer curtain, so no flash was needed. The camera was on manual mode so each time I adjusted the aperture the shutter speed was adjusted as well. White balance was set to auto and ISO was set to 200. Focus was center, right on the cranberry bread.
The only editing done to the pictures was a little crop in Lightroom.
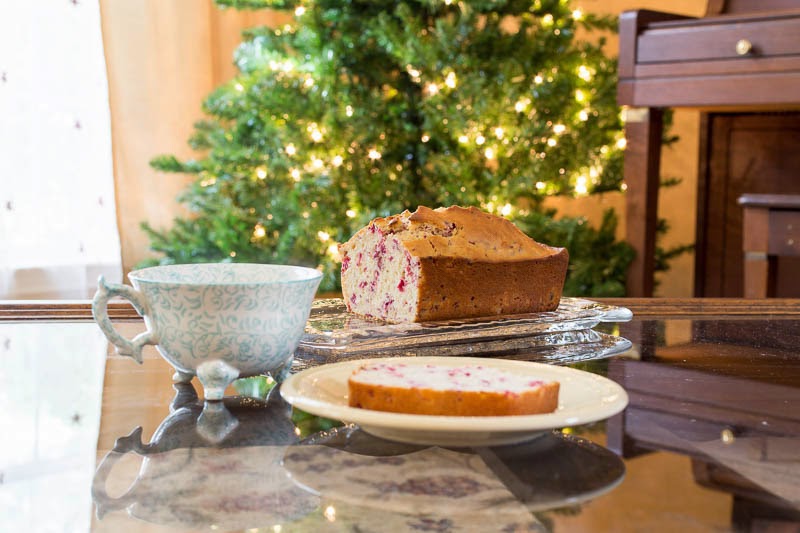
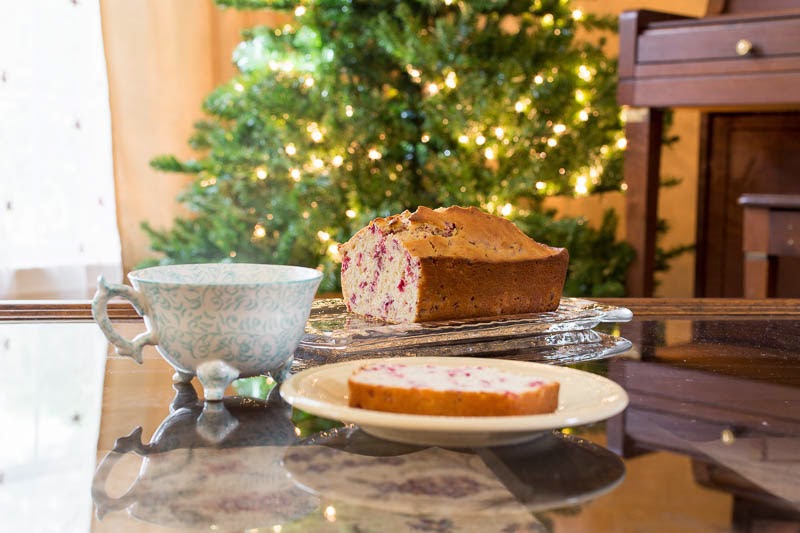
The top photo was set at f8, @ 2 secs. I usually shoot at f8 and adjust my shutter speed as needed. Bryan Peterson calls f8 the "who cares?" aperture. "f8-f11 yield optimum image sharpness and contrast." I have to agree and that is why I use f8 so much. And yes, I can even get some pretty good bokeh at f8!
But if you want circular bokeh, you need a wide open aperture. You need to "stop up". Or open the lens (smaller number) so that more light comes in which will reduce the area in focus and demand a higher shutter speed (faster shutter)
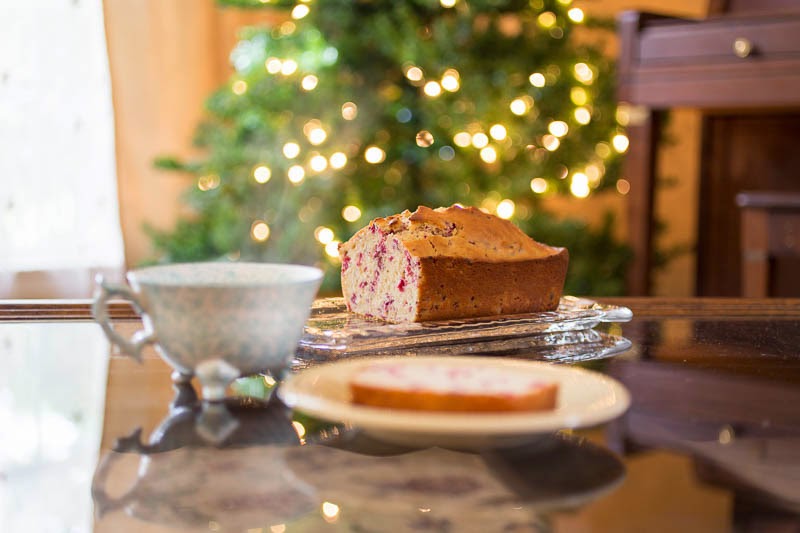
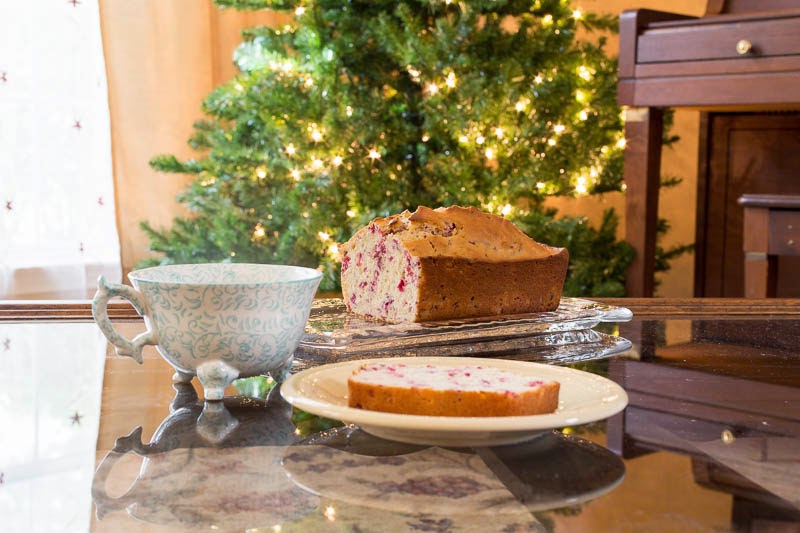
My lens is wide open at f2.5, this shot is f2.5 @ 1/5 sec. The bokeh from the tree is circular. The only thing in focus is the cranberry bread loaf.
As you "stop down" the lens, or close the lens (bigger number) to let less light in, you increase the area in focus and the camera will demand a lower shutter speed (slower shutter).
Each click on my camera to adjust aperture is 1/3 stop. I clicked 3 times to achieve a full stop for each shot.
Your bokeh will begin to change as your aperture starts to close. You will start to see hexagonal shaped bokeh, then starbursts.
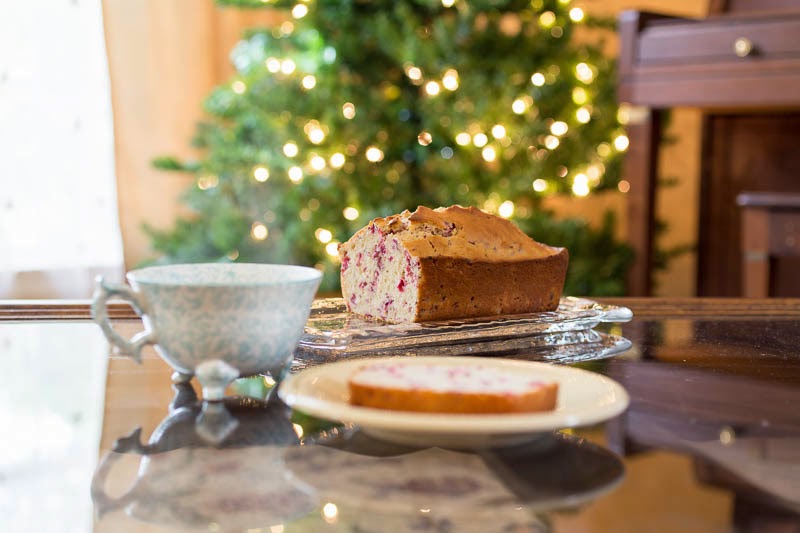
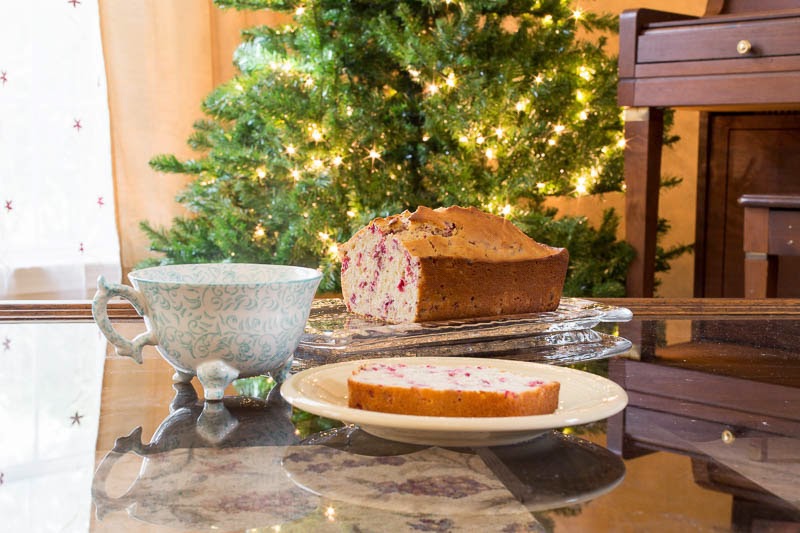
This shot is f3.5 @ .4 sec. The bokeh from the tree is not quite a circle anymore and the cup is starting to come into focus.
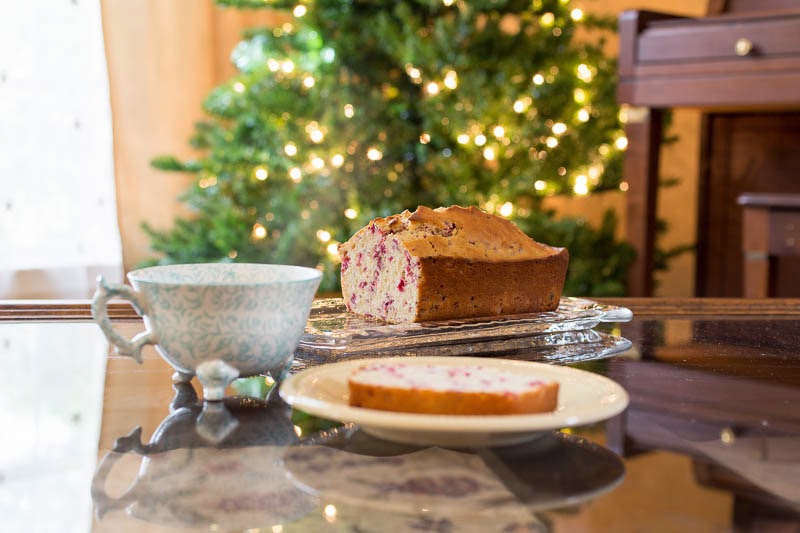
This shot is f5.0 @ .6 sec. The bokeh from the tree is smaller and the plate with a slice of cranberry bread is coming into focus.
This shot is f7.1 @ 1.3 sec. Even smaller bokeh from the tree and almost everything on the table is in focus.
This shot is f10 @ 2.5 sec. Now we're starting to see some starbursts on the tree and the whole room is coming into focus.
This shot is f14 @ 5.0 sec. Lots of starbursts on the tree. Welcome to my living room! Everything is pretty much in focus now.
The lens can go to f32 but I'll spare you. You can see the stars at f10 and even more so at f14. I have gotten some pretty starbursts shooting a picture with the sun in it at f22. Be careful doing that though. Not only can you hurt your eyes, you can also damage your camera. Just sayin'.
That's a little info about getting some pretty bokeh. Experiment a little with aperture on your camera. If you don't want to worry about shutter speed just put your camera in aperture priority mode and try some different apertures! Have fun! Share your bokeh shots in the gallery!
...


5 comments:
Who doesn't love bokeh? And what better time of year to capture it than the season of light? I'm sure this tutorial will be helpful to lots of people who would like to create this effect. I have to say, I do know that opening up my lens creates the round, blurry bokeh that I love so much but I don't think I really thought about the opposite, the stopping down of my lens to create the starburst effect. I am going to have to give that one a try!
Wonderful lesson, Linda. I have that book and I REALLY need to read it to get a better understanding of exposure, we can always learn new effects and methods. I want to try that starburst effect!!
oh I love seeing the comparison here between all the different apertures! I tend to shoot with a wide aperture, but your shots have inspired me to stop down a bit. wonderful!
This is a terrific post, and a lot of work for you and inspiration for us. I always intend to do these types of tests, but I never get around to it. You have truly inspired me today and I will be doing this over the weekend! great post!
I have a tip for you: when using a tripod, always choose the lowest ISO your camera can handle. With the camera being steadied by the tripod, the shutter can stay open as long as you need it to, which means there is no need to bump up the ISO (and risk bumping up the noise in your photo).
I was given this tip a few weeks ago, and it was such a DUH! moment for me, I thought I would share :-)
And I have to say, that little tip has made a huge difference in the clarity and crisp-ness of my photos.
Post a Comment
Thank you for sharing part of your day with us. If for any reason you are unable to leave a comment here on this post, please leave your comment on our Facebook page or in our Flickr discussion group. We love hearing from you!