By Cathy
Every day my inbox is full of random emails. Most I just delete,
but there are some that I faithfully read, like the ones from Digital
Photography School. Their web site has photo tips, tutorials, weekly photo
prompts, reviews on cameras and equipment, post processing tips, and just a lot
of good information. This week’s email led me to an article about bokeh. For
those of you who are new to photography, bokeh is “the aesthetic quality of the
blur, in the out-of-focus areas of an image.” (Wikipedia)
The article included a super easy way to get background bokeh.
Since it was not a good day for me to be outside, the heat index was around
115, I thought I’d give their tip a try. All I needed was aluminum foil, tape, small
objects, and my camera.
I tore off a piece of foil (a little over two feet) and crumpled
it into a loose ball; loose being the key word here. Then I carefully unrolled
the ball. If you crumple the foil too tight into a ball, it will tear as you unroll it. Don’t straighten it out too flat. Those hills and valleys
are what catches the light. Speaking of light, I used a work light pointed
toward the foil for extra sparkle. A flashlight would work for that, too.
Next, I taped the foil to a board. You could use a piece of
cardboard or anything sturdy. One piece of foil didn’t give me enough
background, so I taped another piece below and slightly under the top one. I
used my fingers to crumple the two pieces together so the edge would not show.
Now, it’s time for the object to be photographed. I had to find a
small object, because the foil background was not very big. The object, which I placed on a table, was about 30" from the background.
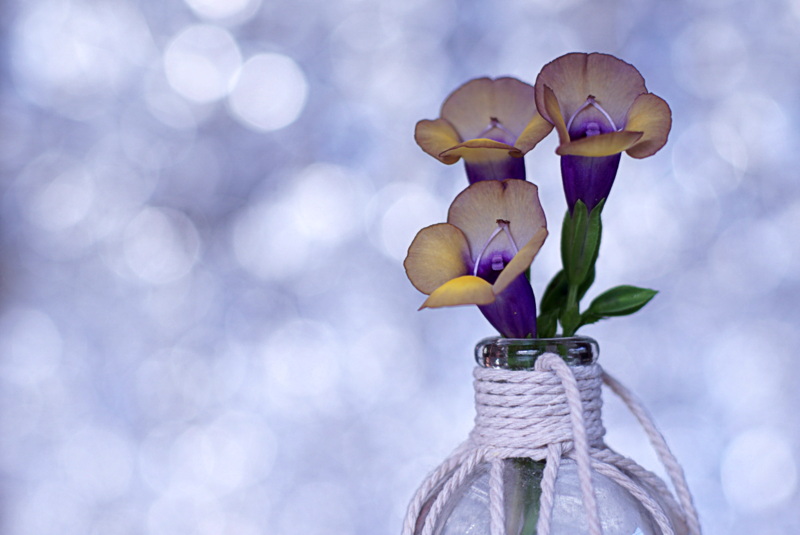
For the picture above I used my DSLR camera with a macro lens. I
set it on aperture priority and used the
lowest setting it would allow, f2.8. The
lower the aperture number, the prettier the bokeh.
I know that not everyone has a macro lens or one that will allow you set the aperture that low, so I took the above picture with my Fuji point and shoot camera.
The lowest aperture I could get was 4.8. It also gave a bokeh background, but it's just a little too distracting.
So . . .
I used a piece of sheer fabric to drape over the foil. Problem solved! I liked it much better.
I began to wonder if would be possible to change the background color. It was.
The pink tint in the above photo was made by placing a translucent pocket envelope
in front of my work light. Voila!
Magical pink in the background.
I thought you might like to see my setup. There’s nothing fancy about
it. I don’t have a studio, I just set up in the living room. I used two TV trays; one for the object and another for the work
light. The board with foil is propped in a kitchen chair.
Experimenting with bokeh was a fun way to spend a hot morning. With
me photography isn’t always serious. I find that If I’m constantly worrying about lens, camera settings, correct composition, and exposure, I take
the joy right out of my photography. Some days
I just like to play and playing with my camera helps me learn to use it
easily and quickly. Photography to me is all about the joy it gives me, not the
perfect picture!
“Anything
that excites me for any reason, I will photograph;
not searching for the
unusual subject matter, but making the commonplace unusual.”
~ Edward Weston
Enjoy your day and don’t forget to play!